

DIY Wall Panelling
Weekend Project: DIY Wall Panelling
Elevate Your Room with Wood Panelling
Looking for a simple yet stunning way to upgrade your walls? Wall panelling is the perfect weekend project to add texture, depth, and a touch of elegance to any room. Whether you’re transforming a nursery or adding charm to a living space, this DIY panelling guide will walk you through each step to achieve that polished look — with minimal fuss!
What You’ll Need:
-
MDF boards (cut to size)
-
No More Nails adhesive
-
Filler
-
Sandpaper
-
Paint (Fleetwood Pro-D 2” brush and EasyClean Washable Matt)
-
Measuring tape
Step-by-Step Instructions
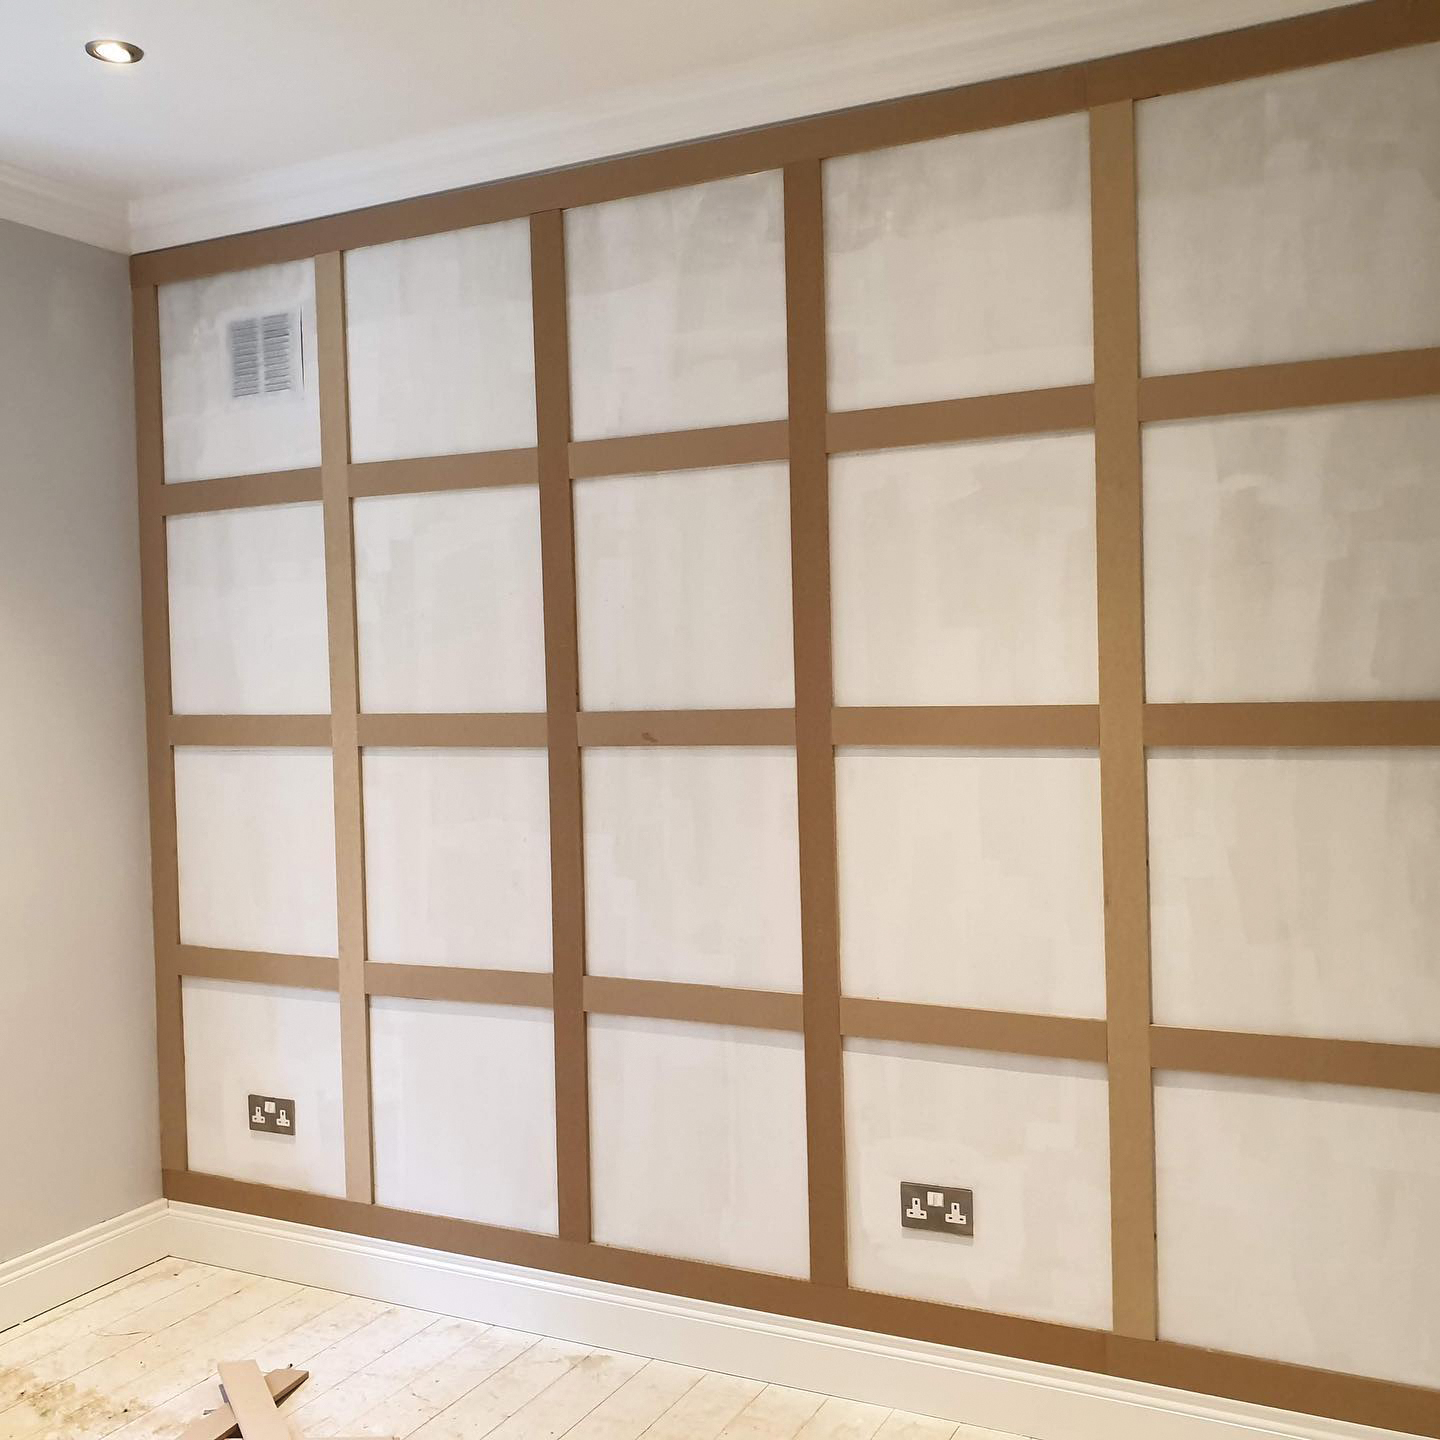
1. Measure and Cut
Begin by measuring your wall and calculating how many squares you’ll need. Use the formula provided below to determine your spacing:
Formula for Wall Width (W):
W = ((No. of Squares + 1) × Board Width) / No. of Squares
Refer to the handy guide to choose the right spacing and layout for your wall width. For instance, for a wall that’s 120″, aim for 5 squares with a spacing of 21″. Cut your MDF boards accordingly with a standard width of 3″.
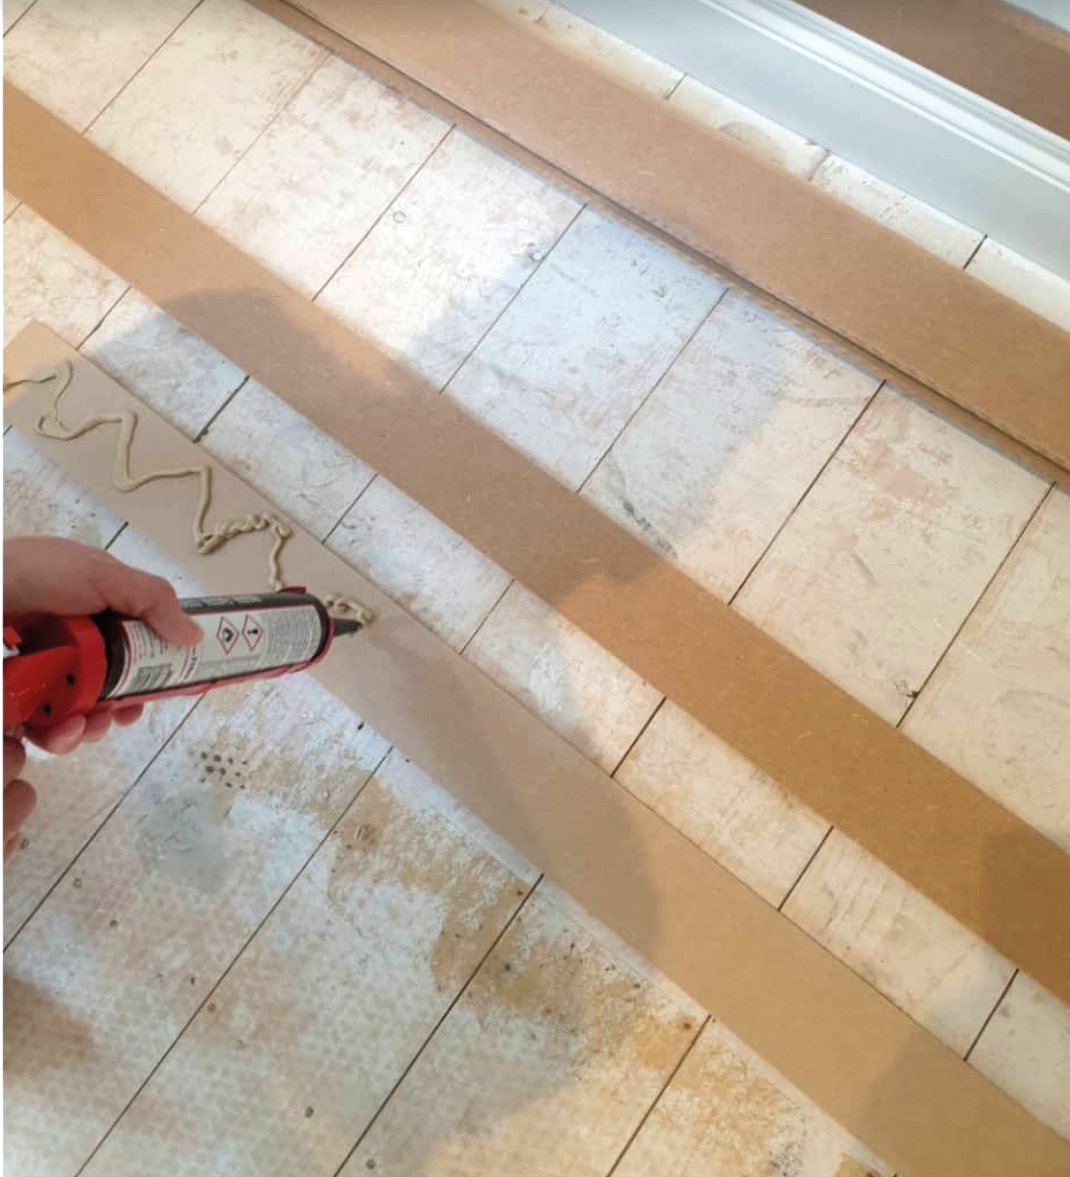
2. Apply the Panels
Start with the outer frame of your grid, then add the vertical boards, followed by the horizontal ones. Use No More Nails to secure the boards to the wall.
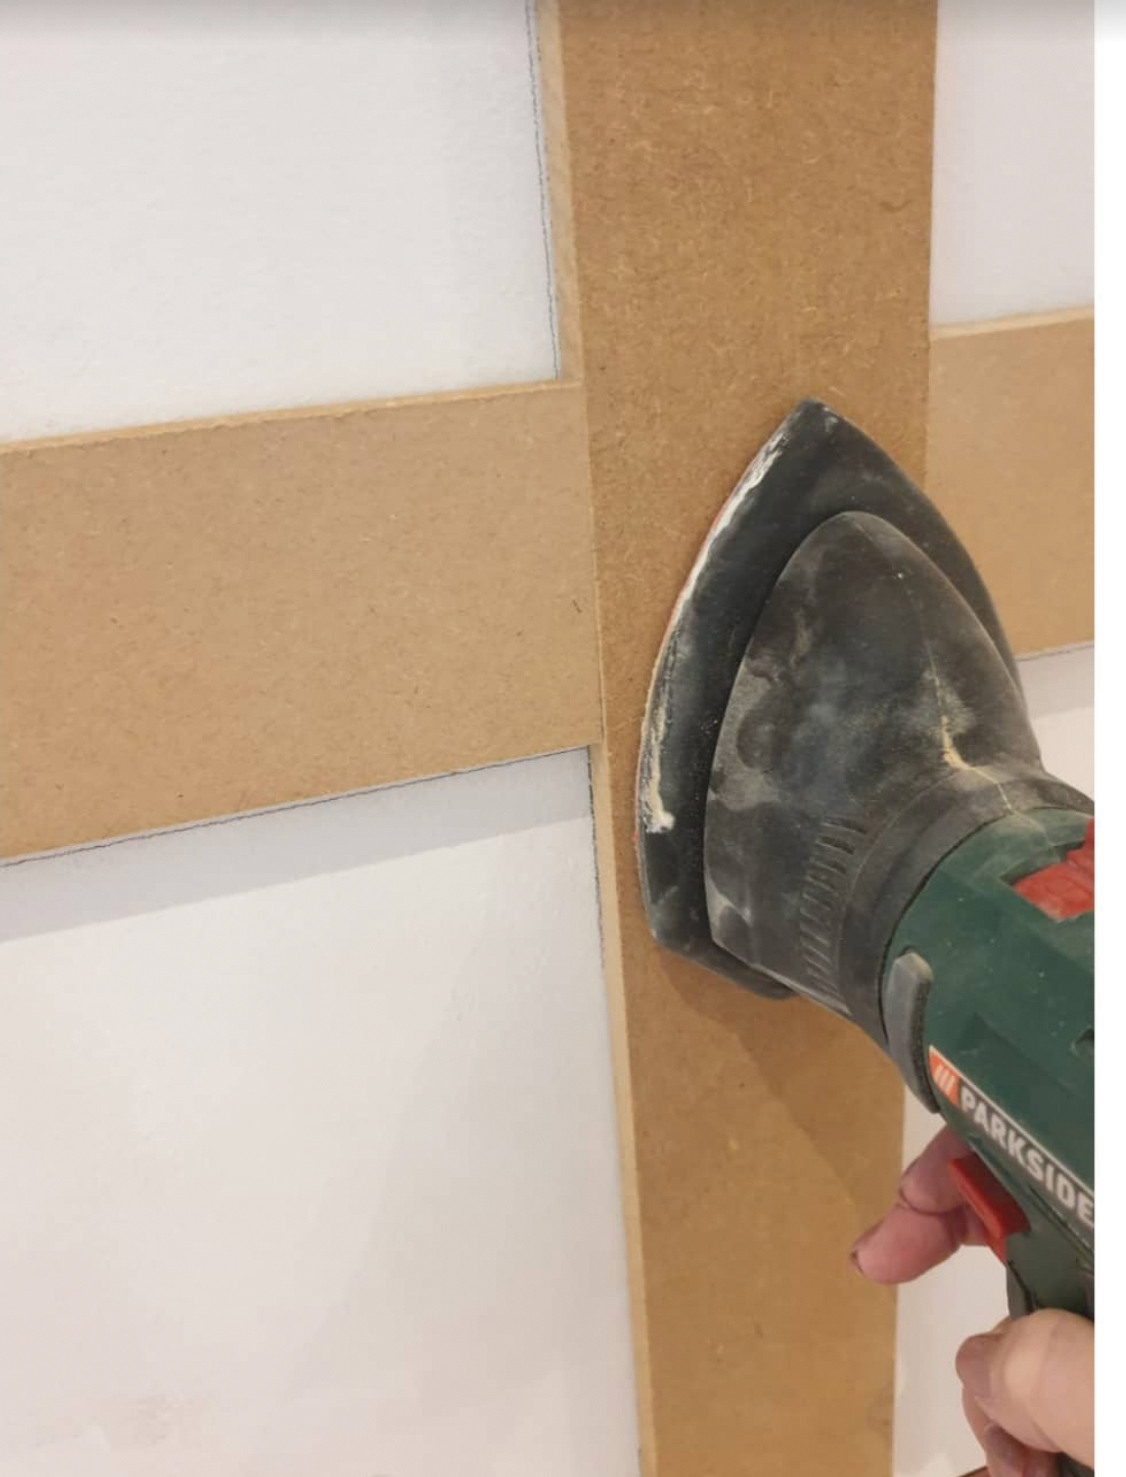
3. Fill and Sand
Gently fill all joints and edges with a wood filler to smooth over any gaps. Once dry, sand down the entire panelled area for a flawless finish.
4. Paint and Transform
Apply a coat of primer, then finish with your chosen wall colour. In this example, Fleetwood EasyClean Washable Matt paint was used for a clean, durable finish perfect for nurseries and high-traffic rooms.

Project by Lorna Pringle of For the Love of Greige
Follow her stunning transformations and detailed tutorials on Instagram: @fortheloveofgreige


